If you do not yet have a suitable camera and macro lens, read this resource first.
Once you have acquired a suitable camera and lens, you’re nearly ready to start scanning film. All you need is a way to hold the film flat, keep your camera steady, and shine light through the back of the film. This can be as simple as taping your film to an inexpensive light box and pointing your macro lens at it, or as advanced as fully automated film holders with dedicated software. Since it’s impossible to cover every option, I’ll focus on what I know best.
Key Considerations for Film Holders
1. Holds Film Flat
Keeping the film flat becomes increasingly critical as your frame size increases. Any waves or bends in the film can cause distortions in your scans and may introduce unwanted reflections.
2. Minimizes Reflections and Front Light
Ideally, no light should come from the front of the film plane—all light should originate from behind. Scanning in a dim or dark room is highly recommended. Even in such conditions, reflections from your film holder or camera lens can degrade scan quality, reducing sharpness and causing bright or dark spots on the film.
3. Ease of Frame-to-Frame Changes
Efficiency matters. A good film holder minimizes how much you need to handle the film, reducing the risk of scratching, smudging, or adding dust. Quick and consistent repositioning of frames also speeds up your workflow.
Key Considerations for Light Sources
1. High Color Rendering Index (CRI)
A quality light source is essential for bringing out the full color range in your film. Look for a CRI rating above 95 for optimal results, especially with color negatives.
2. Proper Diffusion
Even light diffusion is crucial. Uneven lighting, such as bright spots or dark corners, will be inverted and magnified in your scans. This can cause noticeable unevenness in skies or grainy vignetting in shadows. Addressing these issues often requires additional processing, like flat-field correction, which can still fall short of achieving the best results.
Why I Recommend Valoi’s 360 System
After experimenting with less sophisticated setups early on, I invested in the Valoi 360 system. This modular kit includes film holders and accessories for a wide range of film types and sizes. You can start with the essentials and expand your setup over time.
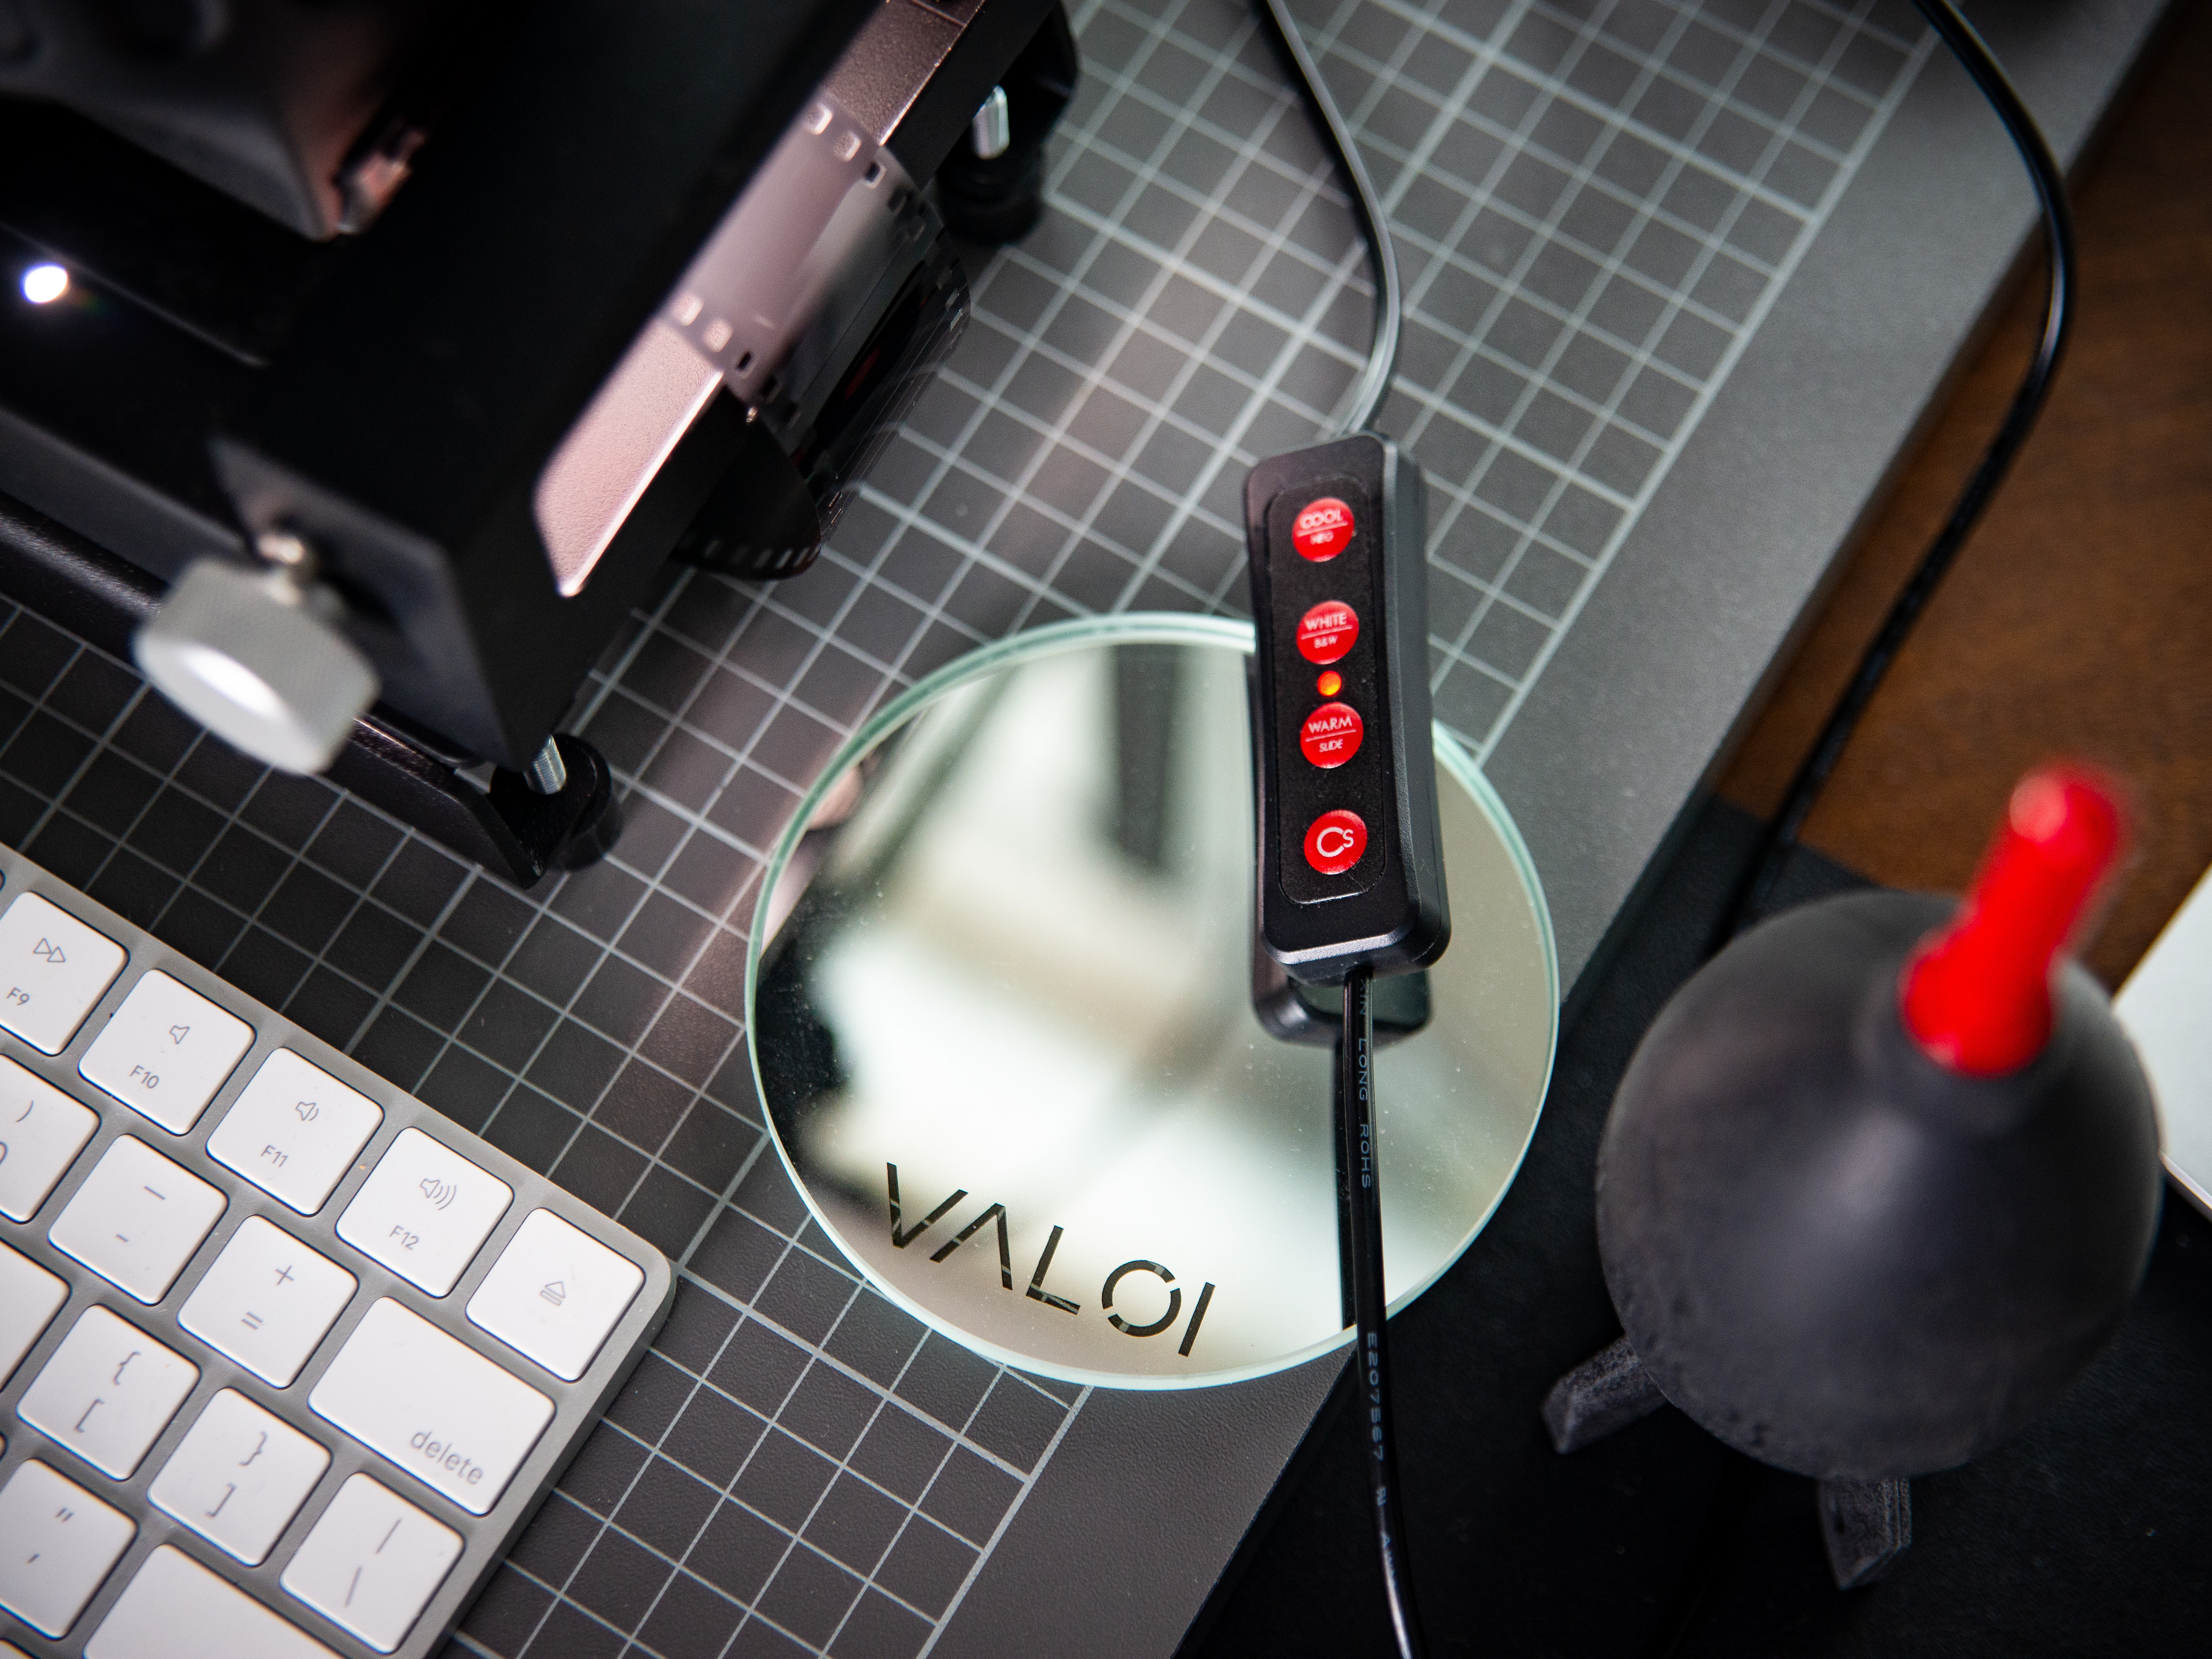
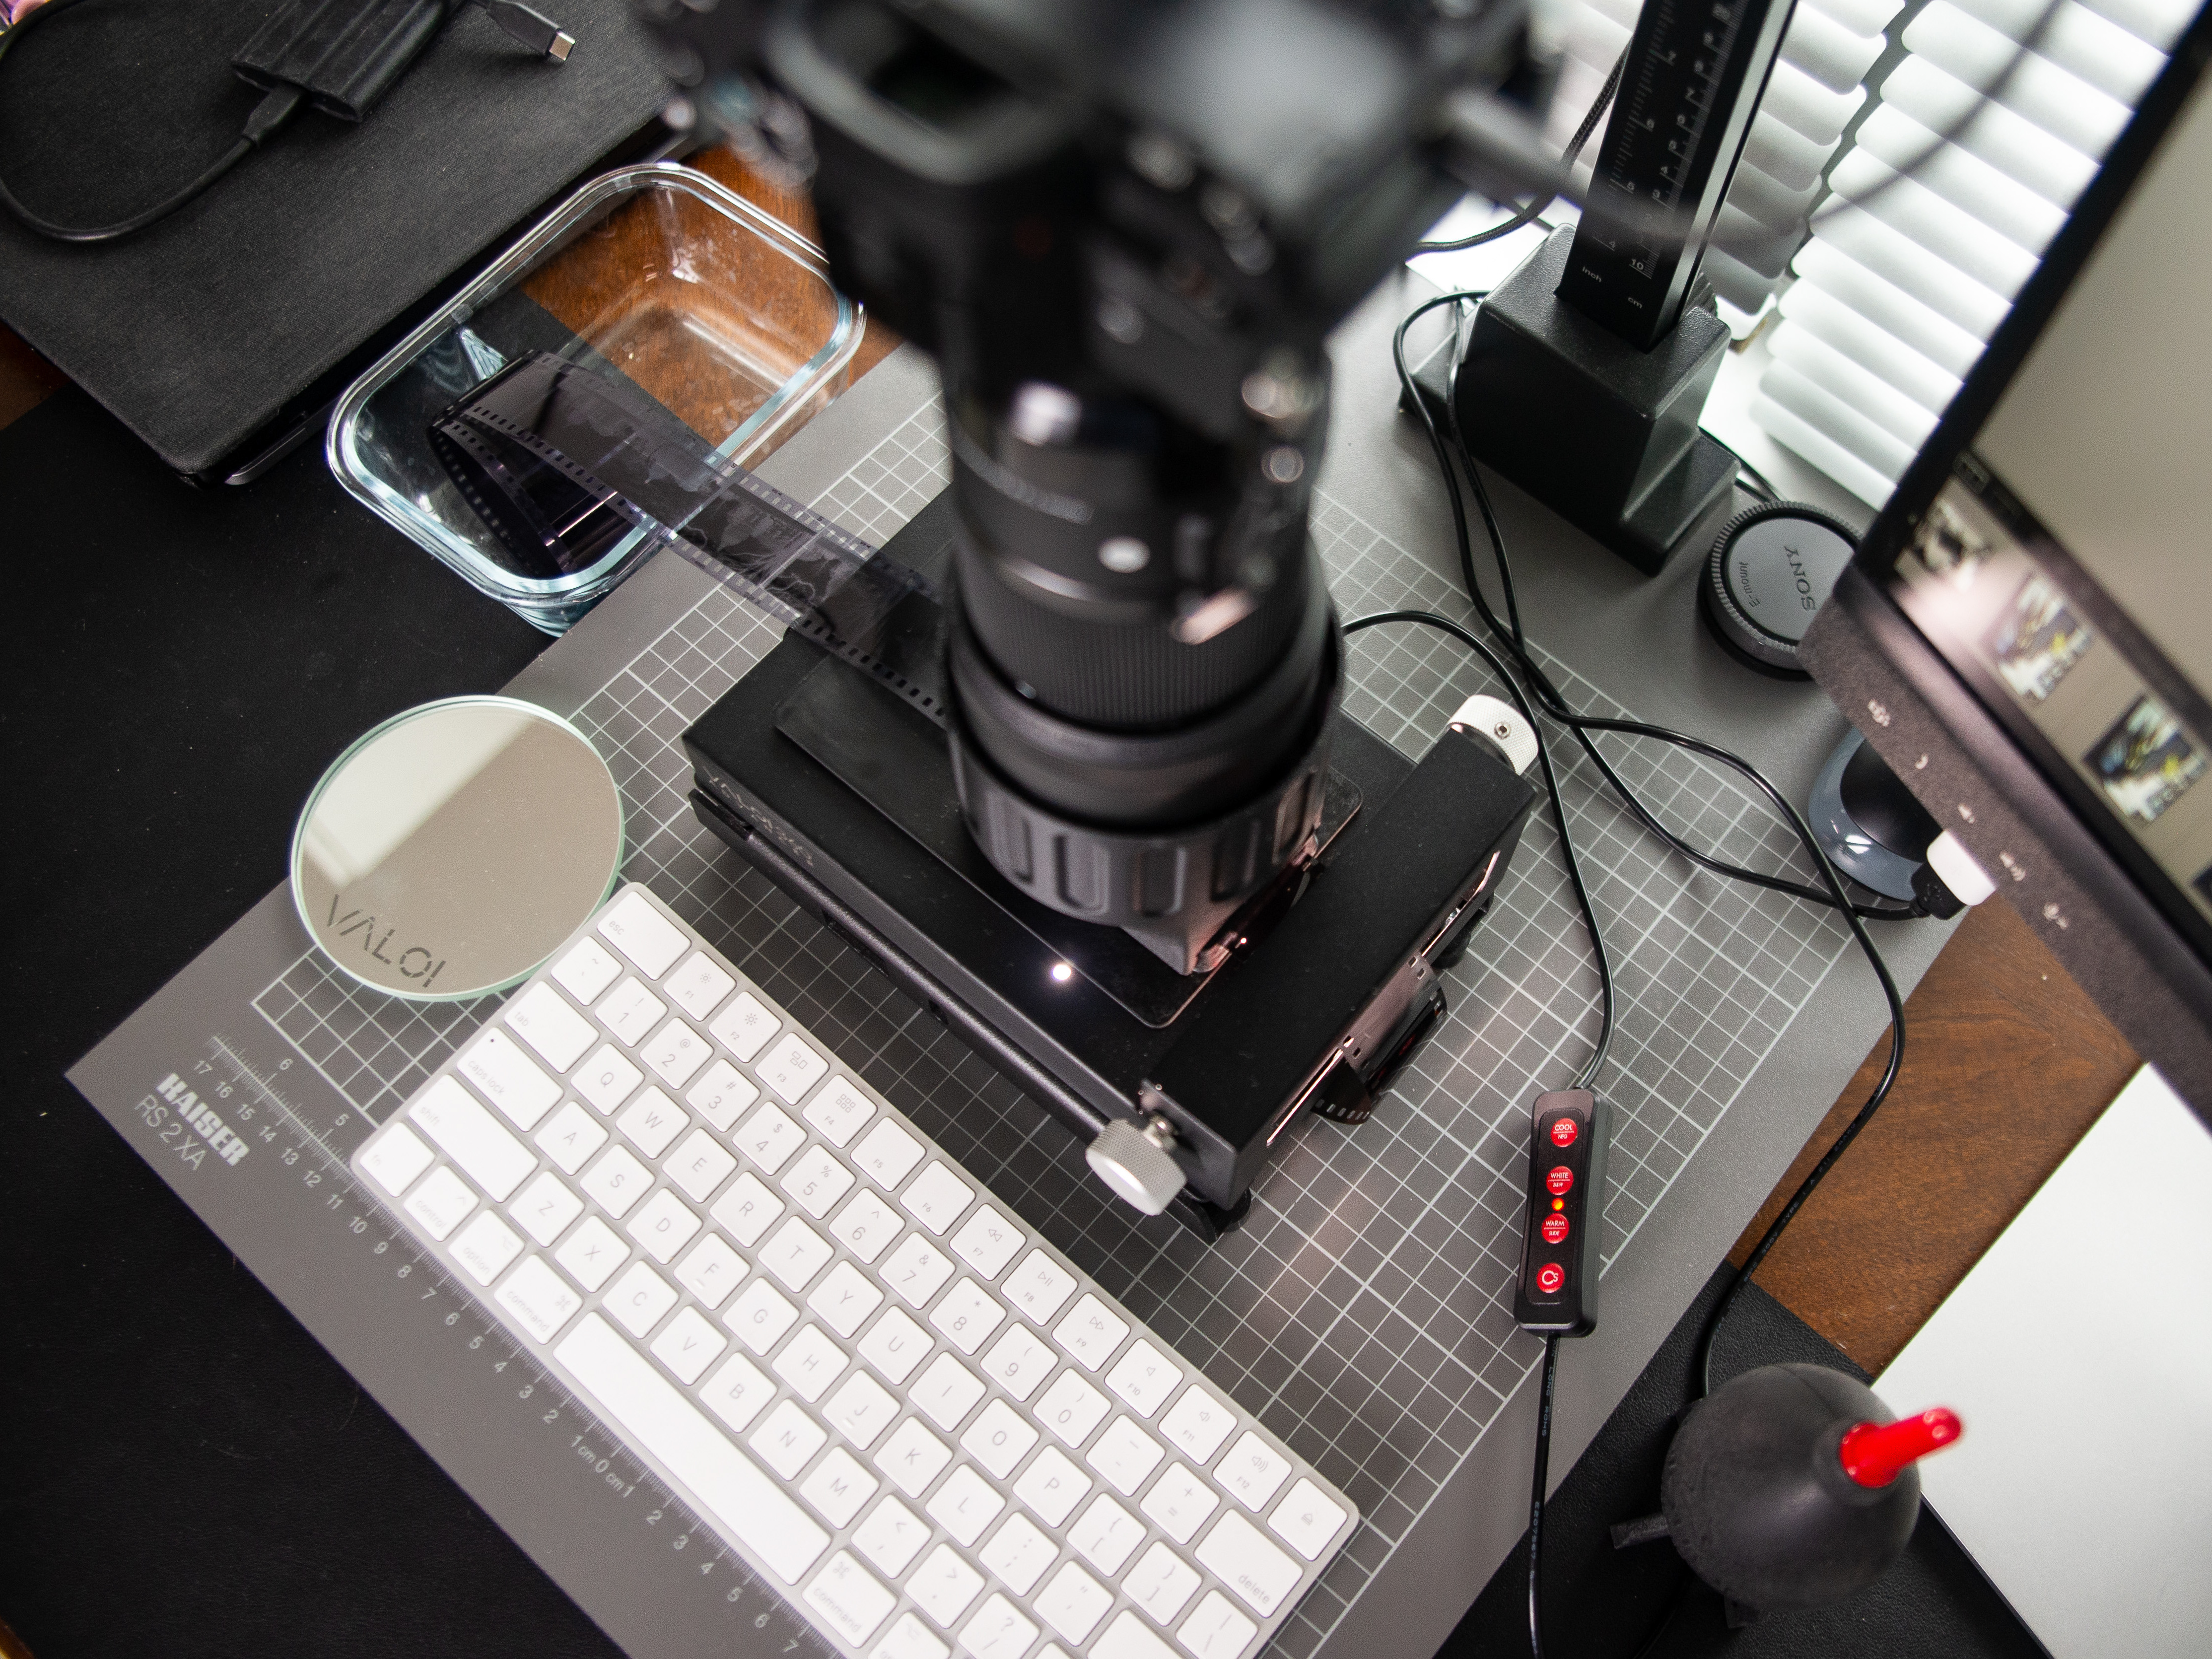
I use holders for formats like 110, 126, and 127 in addition to standard 35mm and 120 film. The kit pairs seamlessly with the Cinestill CS-LITE, an affordable, high-quality LED light designed for scanning.
My favorite component is the Valoi 360 “Advancer,” which features rubber rollers and knobs to pull the film through the holder frame by frame. This allows precise positioning and quick film advancement. With the Advancer, I’ve reduced my scanning time to under three minutes per roll (after camera settings are calibrated). I’ve scanned over 100 rolls using this setup, saving thousands of dollars compared to professional scans.
Note: I’m not being paid to recommend Valoi—I genuinely trust in their products. That’s why they were the first company I approached when we kicked off our film scanning and workshop series. Valoi generously donated two of their systems for our community’s use.
Alternatives to Valoi’s 360 System
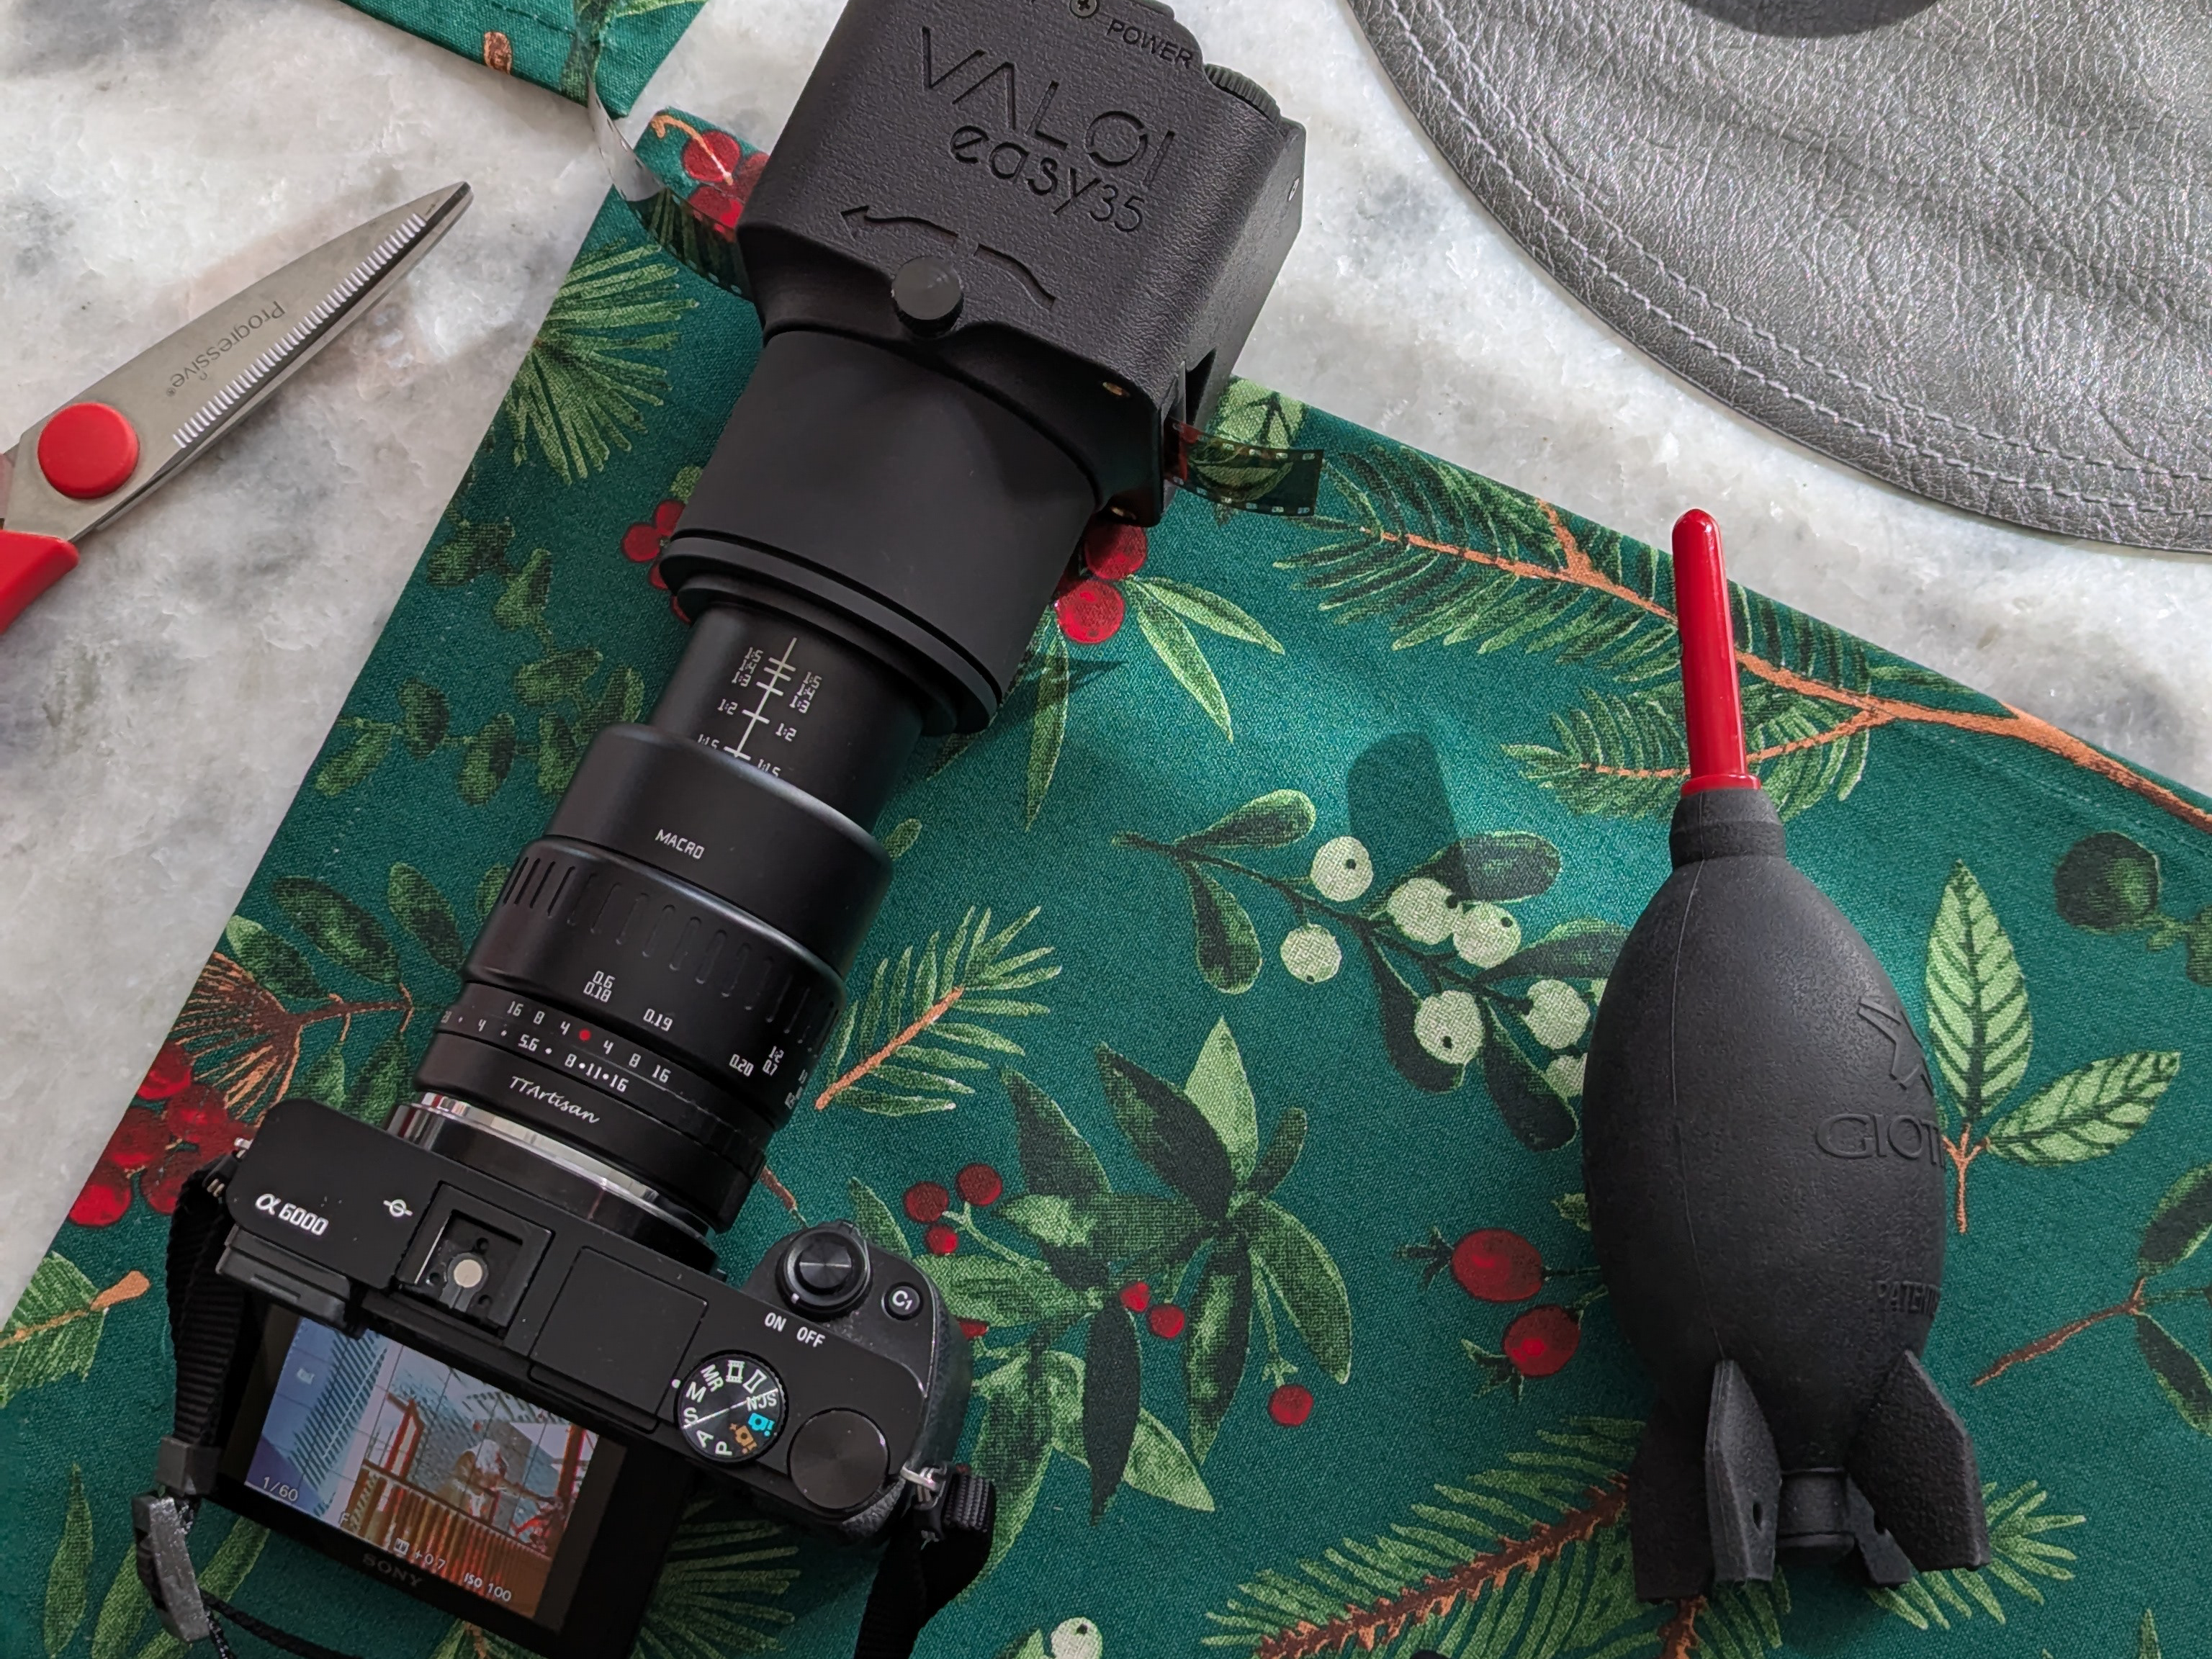
Valoi Easy35 (and Valoi Easy35 v2)
For 35mm film shooters, the Valoi Easy35 system is an excellent budget-friendly option. This compact solution combines a high-quality light source and film holder that attaches directly to your macro lens, eliminating the need for a tripod or copy stand. It delivers impressive results for less than the full 360 system.
NEW for 2026: Valoi now offers two versions of their scanning system: the original Easy35, built with 3D-printed and off-the-shelf components, and the new Easy35 v2, featuring custom injection-molded parts and a proprietary light source. I stand by my original assessment that the Easy35 is a fantastic system. However, with extremely thin negatives, the light source could appear slightly uneven, dropping off in the corners. This vignetting could occasionally cause a white haze in the corners of inverted images. The new Easy35 v2—which I’ve recently purchased—promises to completely resolve this vignetting while offering even tighter mechanical tolerances.
Negative Supply
Negative Supply offers another well-regarded system. While their products are excellent, I ultimately chose Valoi based on price. However, it’s worth checking out Negative Supply to see if their offerings better suit your needs.
3D-Printed Options
For those interested in DIY solutions, many 3D-printed film holder designs are available online. Some companies even sell complete kits based on their proprietary designs. I plan to explore these options in the future and will compile a list of promising designs. If you have experience with 3D-printed or homemade solutions, I’d love to hear about it.
Choosing a Copy Stand
Most film scanning systems, whether from Valoi, Negative Supply, or DIY options, require a way to secure your camera at a fixed distance with the sensor parallel to the film plane. While a tripod can work, a dedicated copy stand offers far greater stability and ease of use.
What to Look For in a Copy Stand
The simplest copy stands feature a sturdy vertical column attached to a flat baseboard or desk clamp. High-quality stands go further, offering multiple adjustments while remaining rigid and vibration-free.
Brands to Consider
Options from Kaiser, LPL, Smith-Victor, Promaster, and Impact are worth exploring. Both Valoi and Negative Supply also offer stands designed specifically for film scanners. Alternatively, you could adapt an old darkroom enlarger or use a “maker-style” design with extruded aluminum profiles and 3D-printed brackets.
My Experience
To date, I have used the Valoi Essential Copy Stand (v2) for most of my film scans. It fit my needs and conveniently disassembles for storage. However, I decided to upgrade my home setup after I purchased a used Kaiser RS-1 for our community film space at the start of 2025. The Kaiser’s heavy-duty, professional quality is unmatched, but it comes at a significantly higher price: ~$160 for the Valoi vs. $1,100 retail for the Kaiser. In this case, you truly get what you pay for.
Thankfully, there is a robust used marketplace for this kind of gear. After a few months of watching, I managed to purchase the Kaiser RS-1 from a friend for $400. For myself, I snagged a smaller but still excellent Kaiser RS-2 XA on eBay for about $230 with shipping. I've been extremely happy with the upgrade.
Whether you’re starting small or diving in with a more advanced setup, choosing the right film holders, light sources, and copy stands will significantly improve your camera scanning experience and results. Happy scanning!
Learn More
I provided my recommendations for cameras and lenses for camera scanning here. I also share why I think camera scanning is the best way to scan your film in 2025.